|


|
|
|
Posted by Marc
from Garden Desk
My garden has no tomato plants in it right now. It is Fall in my garden and I am growing lots of broccoli, cabbage and lettuce in the space where tomatoes grew during Summer. Now that time in the garden is getting shorter, I can begin planning for next season. It is time for me to reflect on how things went this year in the vegetable garden, and figure out ways to improve next year's garden.
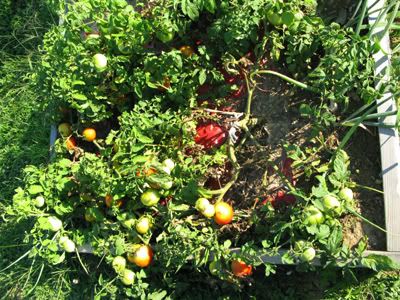
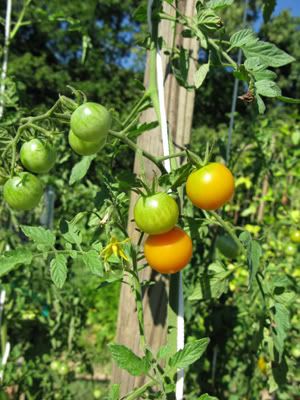
The main thing I like to experiment with in my garden is tomatoes. I'm always looking for different kinds of tomatoes, different color tomatoes, and different heirloom tomatoes. This year, I raised over 30 different kinds of tomatoes and had at least two plants of each kind. The biggest problem I had was that I never managed to put any support on some of my tomato plants.
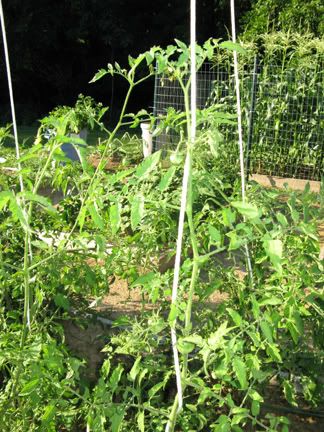
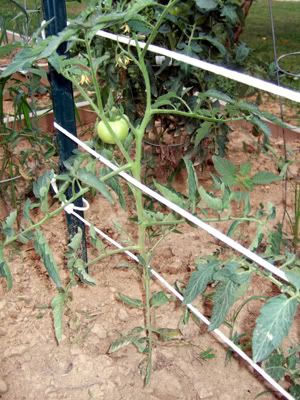
If you don't stake or tie up your plants, it can get pretty messy.
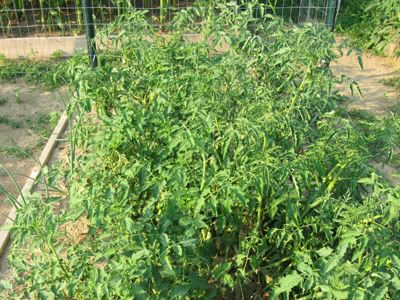
The biggest problem with not supporting the plants is that the fruits lay on the ground. There they are more susceptible to animals and are prone to rot.
So if the above pictures show what not to do, what is the best way to support tomatoes?
Many people tie each plant to a stake. Others use store-bought cages, but they tend to fall over on me after my plants reach about five feet tall. How to support tomato plants is another thing I have experimented with a great deal and my favorite three methods are; Topless Tables, A tomato tower trellis, and the Florida Stake and Weave.
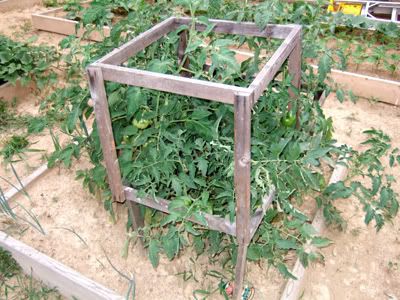
1. Topless Tables
Several years ago when I still tried to use store-bought tomato cages, I grew more plants than I had cages for. My solution was to build tomato cages out of scrap wood. To me they looked more like tables without a top, so my family began calling them "topless tables". Here is one compared to the regular cages:
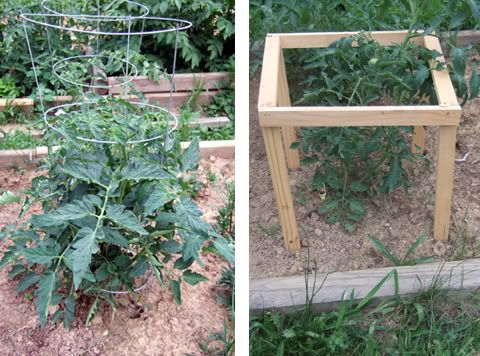
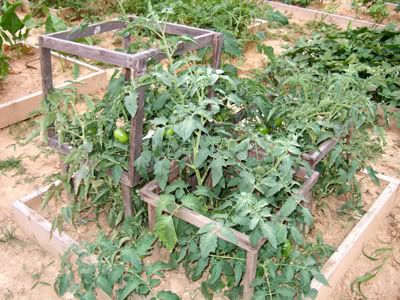
These don't look pretty, but they keep the tomatoes off the ground without any pruning, staking or tying. The tomato plant grows through the middle and the branches sprawl over the sides. I have experimented with making double-decker tomato tables, but I don't think it is necessary.
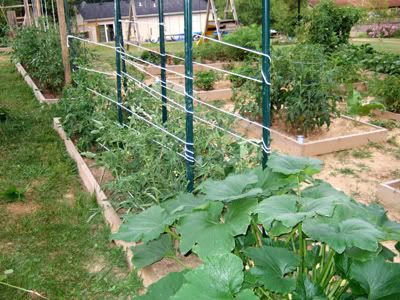
2. Tomato Tower Trellis.
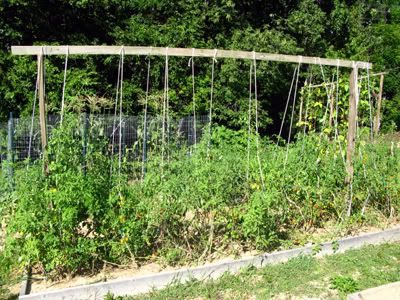
At least one of my raised beds occupies our grand tomato trellis each year.
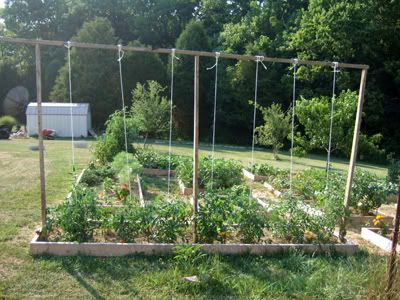
It is basically a very tall trellis in which you tie twine or clothesline from the top and then loop the other end around the base of the plant (you do not tie it to the plant). You then wind the twine around the central stem as the tomato plant grows.
This keeps the plant growing straight and upright. It works best if you keep the suckers pruned off of the central stem. I have used this method for years, but you can only support a limited number of plants this way. This year, instead of placing the tomato plants directly under the trellis frame, I put the trellis in the center of two rows of plants and made the twine go from a plant on one side, over the top, and to a plant on the other side. This doubled production of the trellis, but looked a bit confusing.
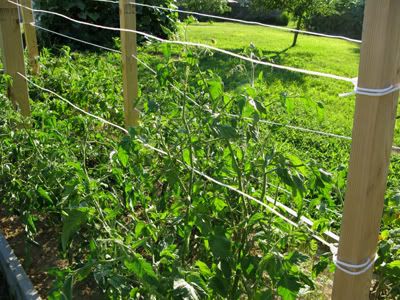
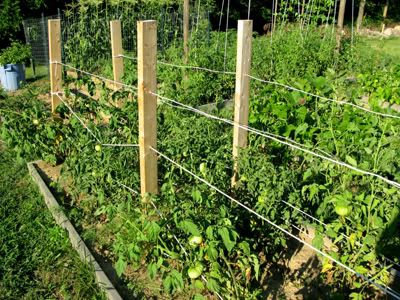
3. Stake and Weave
The Florida Stake and Weave gets its name from the practice that Florida commercial tomato farmers developed many years ago. It works well in the backyard garden too.

You put stakes in between each plant or every few plants depending on how closely spaced you tomatoes are. You then tie twine or clothesline from post to post, weaving in and out of the tomato plants. With subsequent twines above one another weaving the opposite direction, you can easily "suspend" your tomato plants.
My improvement this year was to use 2x4s as the stakes and instead of tying the twine to each post, I drilled a hole in the stake for the twine to go through. I still weaved the plants in the same way, but these stakes made the system look much cleaner.
So what about you? How do you support your tomatoes? Stakes or cages? Stake and Weave or some other system? Do you tie them up or use a trellis? Do you have your own creative way of keeping those tomatoes off the ground? I am always looking for a new idea to try and I'd love to know your thoughts here.
Thanks and Happy Tomato Picking!
Keep Growing,
- Marc
| Symptom | Cold | H1N1 Flu |
| Fever | Fever is rare with a cold. | Fever is usually present with the flu in up to 80% of all flu cases. A temperature of 100°F or higher for 3 to 4 days is associated with the H1N1 flu. |
| Coughing | A hacking, productive (mucus- producing) cough is often present with a cold. | A non-productive (non-mucus producing) cough is usually present with the H1N1 flu (sometimes referred to as dry cough). |
| Aches | Slight body aches and pains can be part of a cold. | Severe aches and pains are common with the H1N1 flu. |
| Stuffy Nose | Stuffy nose is commonly present with a cold and typically resolves spontaneously within a week. | Stuffy nose is not commonly present with the H1N1 flu. |
| Chills | Chills are uncommon with a cold. | 60% of people who have the H1N1 flu experience chills. |
| Tiredness | Tiredness is fairly mild with a cold. | Tiredness is moderate to severe with the H1N1 flu. |
| Sneezing | Sneezing is commonly present with a cold. | Sneezing is not common with the H1N1 flu. |
| Sudden Symptoms | Cold symptoms tend to develop over a few days. | The H1N1 flu has a rapid onset within 3-6 hours. The flu hits hard and includes sudden symptoms like high fever, aches and pains. |
| Headache | A headache is fairly uncommon with a cold. | A headache is very common with the H1N1 flu, present in 80% of flu cases. |
| Sore Throat | Sore throat is commonly present with a cold. | Sore throat is not commonly present with the H1N1 flu. |
| Chest Discomfort | Chest discomfort is mild to moderate with a cold. | Chest discomfort is often severe with the H1N1 flu. |

Vol. 4, Num. 44, October 29, 2009 (Read It Online)Hello Dee, Leaves are changing color and falling in the Pacific Northwest, as they probably are where you live. Today we have a great article from Ellen about Compost "Tea" and a tip about using your leaves as mulch. Please send in your tips and photos for gardening this time of year, such as how you are preparing for winter or next spring.
Thanks for reading,
The ThriftyFun Team
- Send to a Friend!
- Submit Your Gardening Tips
- Submit Photos of Your Garden
- Submit a Gardening Request
Edit Your Subscriptions: To edit your ThriftyFun subscriptions, click the Update Profile/Email Address link at the bottom of this newsletter.

Today's newsletter contains: Photos:
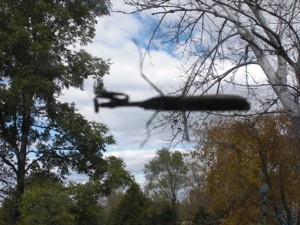
- Garden: Walking Stick
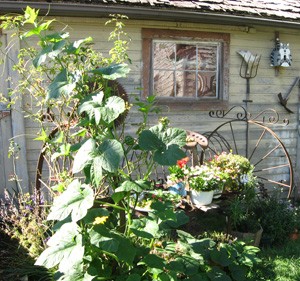
- Garden: Volunteer Gourd
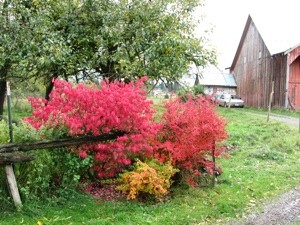
- Garden: Burning Bush
- Reuse Halloween Pumpkins In Fall Displays
Tips and Articles:
- Leaves are Free Fertilizer
- How To Make Compost Tea
- Garden: Deer and Rabbit Deterrent
- Where to Shop for Bulbs
New Requests:
- Old Blue Spruce Tree Is Dying
- Propagating a Weeping Willow Tree
- Tangelo Oranges Falling Off the Tree Early
- Remediating Creosote Logs in the Garden
- Getting Rid of Bats in the Attic
- Deterrent for Snakes
- Do Junipers Acidify the Soil?
- Importance of Insects
- I Saw a White Deer
- Making a Compost Bin With a Plastic Garbage Can
- Storing Flower Bulbs
- Keeping Dogs Out of the Garden
- Keeping Cats Out of the Garden
- Growing Sunflowers Without Sunlight
- Caring for a Burning Bush Plant
- Is Horseradish a Radish?
- Cucumbers Turning Yellow
Today's Sponsor: If you are an avid crafter, capable writer and own a digital camera, you are eligible to participate. Submit your craft projects to ThriftyFun and we will pay $15 for any crafts that we publish.
More Information:
Click Here: http://www.thriftyfun.com/post_craft.ldml
I started out of the front door the other day only to stop dead in my tracks seeing this walking stick sunning on the glass. I rerouted my steps to grab the camera and finished my coffee inside!
Photos: By melody_yesterday from Otterville, MO
Post Feedback: http://www.thriftyfun.com/tf38294000.tip.html
Email to a Friend | Get Responses | Bookmark | Link | Print | Rate It:

|

The seed that started this plant was dropped in front of our hay rake and started growing. It climbed up our rose and grew quite large! You can see a small gourd growing if you look closely!By Jackie from Enumclaw, WA
Post Feedback: http://www.thriftyfun.com/tf39878185.tip.html
Email to a Friend | Get Responses | Bookmark | Link | Print | Rate It:
This is our brilliant fall burning bush and variegated barberry.By Jackie from Enumclaw, WA
Post Feedback: http://www.thriftyfun.com/tf30799846.tip.html
Email to a Friend | Get Responses | Bookmark | Link | Print | Rate It:
Reuse Halloween Pumpkins In Fall Displays
After Halloween last year, I took down my scarecrow, but his pumpkin head was still fresh. I added his head to a bale of hay in the front yard for a fall decoration. My granddaughter asked, "How did the scarecrow get inside of the hay?"By Vickie from Earle, AR
Post Feedback: http://www.thriftyfun.com/tf62798791.tip.html
Email to a Friend | Get Responses | Bookmark | Link | Print | Rate It:
Tips and Articles: Why are people raking or blowing their leaves to the street for the city government to collect? Leaves are a type of free fertilizer, and yet we pay our cities to haul our free fertilizer away every fall, and then buy unnatural, non-organic chemicals, or organic fertilizers in the spring to replenish our lawns.
Why are we doing this? This has been bothering me for years. I garden; and, because we all need to "think green," (before the mulching mower) I would rake all the leaves up, and dig a huge hole in the garden, or vice-versa, and rake all of the leaves into the hole I created in the garden, then back fill all of the dirt into the hole.
The first spring, when I dug into that tree leaf back fill, I was surprised by some of the darkest, most lovely soil I had ever seen in my life.
I truly feel that deciduous trees are trying to give back to us in the fall everything they accumulated from the sun, rain, and soil that spring and summer.
Yet, without thought, so many of us rake those leaves up, waiting for the city to come take them away, and we devoid our own property of those nutrients, replenishing them in the spring with other nutrients - organic, or not.
In the years that have passed, I've gotten married, and we now own a mulching lawnmower. I really like the idea that the lawnmower mulches the fallen leaves; however, the mulching lawnmower uses gasoline.
For ourselves, and those that are here, and those to come, let's "think green." Really, what are we doing to our own properties when we give the city our leaves, and devoid our own land of those nutrients?
Source: Myself. I was inspired to write this today, after I heard a noise outside and asked my husband what that noise was. He replied that it sounded like it might have been a leaf-blower, or even a leaf-mulcher.
By Carol L. from South Bend, IN
Post Feedback: http://www.thriftyfun.com/tf19650808.tip.html
Email to a Friend | Get Responses | Bookmark | Link | Print | Rate It: IMG
"There are more than 60 different cuts of beef in the average supermarket today. And identical ones can go by lots of different names, making the navigation of the meat case more than a bit confusing.
Did you know that a New York strip is the same as a top loin boneless steak? And that sometimes packages for those two could be sitting side-by-side in the case at difference prices per pound?
Here's a quick reference list to make sure you are not getting ripped off."
Name of cut: T-bone
Also known as: Porterhouse
Name of cut: Tenderloin
Also known as: Filet, Chateaubriand
Name of cut: Top loin boneless
Also known as: Strip, Kansas City, New York strip
Name of cut: Top loin bone-in
Also known as: Strip, Sirloin strip, Club
Name of cut: Ribeye
Also known as: Delmonico
Name of cut: Skirt
Also known as: Fajita meat, Philadelphia
Name of cut: Hanger
Also known as: Hanging tenderloin
Name of cut: Flank
Also known as: London broil
Name of cut: Sirloin
Also known as: Flat-bone, Round-bone
Name of cut: Top sirloin boneless
Also known as: London broil, Sirloin butt
Name of cut: Round tip, thin sliced
Also known as: Beef sirloin tip, Sandwich steak, Minute steak
Name of cut: Top round
Also known as: Top round London broil
Name of cut: Top blade boneless
Also known as: Flatiron, Butler
|